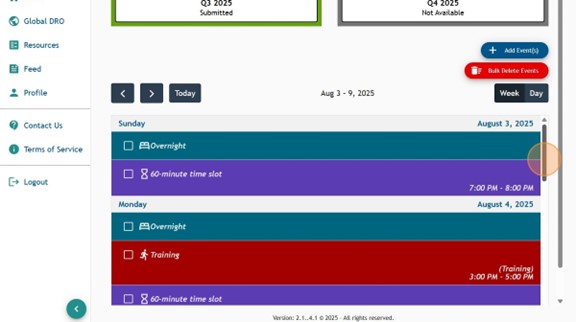
1. Log into Athlete Connect and navigate to the Home screen.

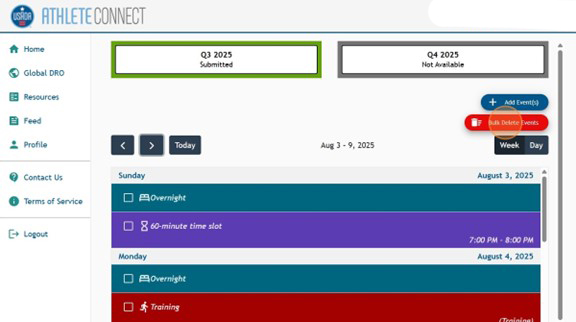
2. Click the “Bulk Delete Events” button.
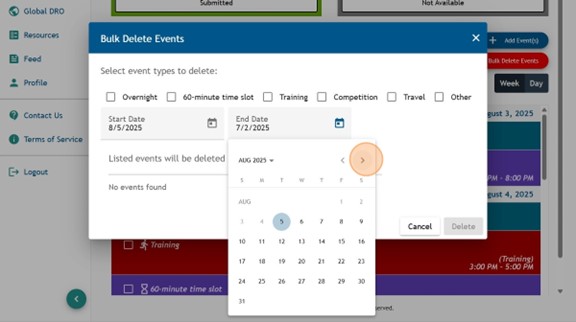
3. Select the date that you are traveling as the Start Date and the last day that you will be traveling as your End Date. For this example, the departure date will be August 5, and the return date will be August 9. Because of this, the date range entered will be August 5 through August 8.
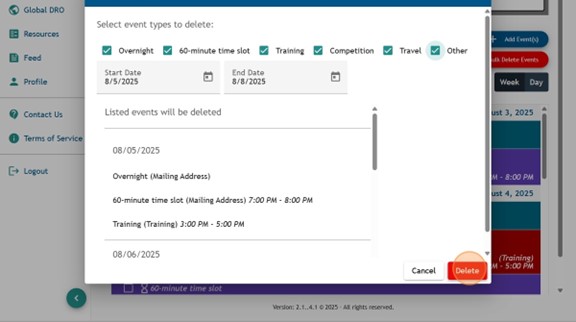
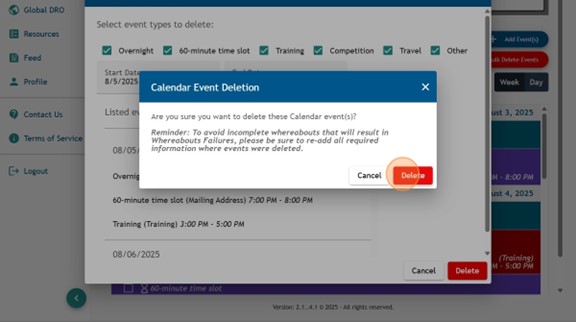
4. Select all of the possible event types listed.

5. Scroll through the list of events that will be deleted and confirm that you would like to delete all the events (as the locations will be incorrect). Once confirmed, click “Delete”.
6. Read through the “Calendar Event Deletion” message and select “Delete”.
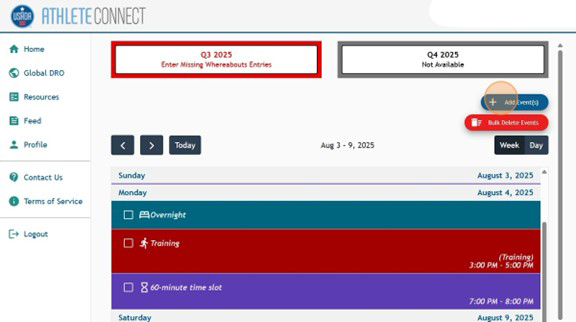
7. Click the “Add Event(s)” button.
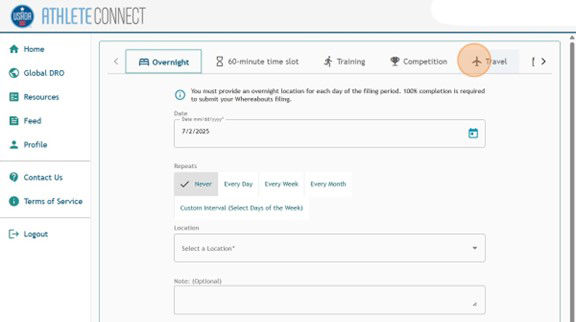
8. The first set of entries that we will input for the period will be the Travel entries. Click the “Travel” tab at the top of the screen.
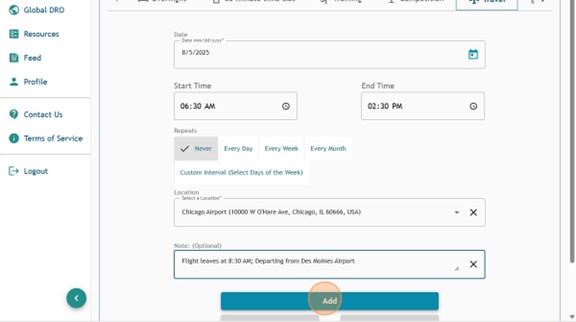
9. Select the date that you will depart for travel as the start date.
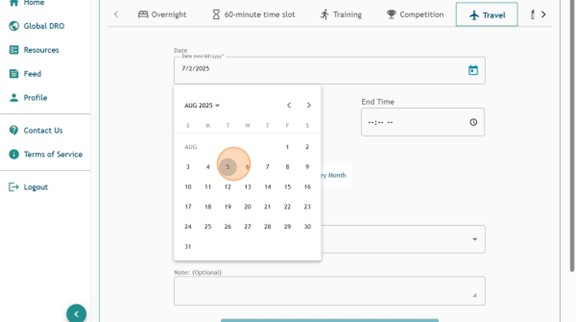
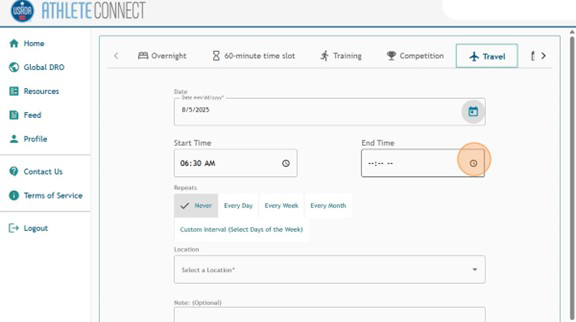
10. Select an applicable start and end time for your travel on the day. In cases that you are flying, we would recommend inputting a Start Time of when you would estimate you will arrive at the airport or start your travel to the airport and set the End Time based on when you are estimated to land. In cases where you are driving, we would recommend inputting the estimated Start Time and End Time that you will depart from your current location and arrive at your final destination.
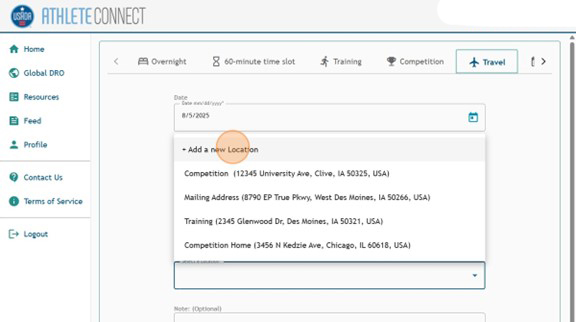
11. Click the “+ Add a new Location” option.
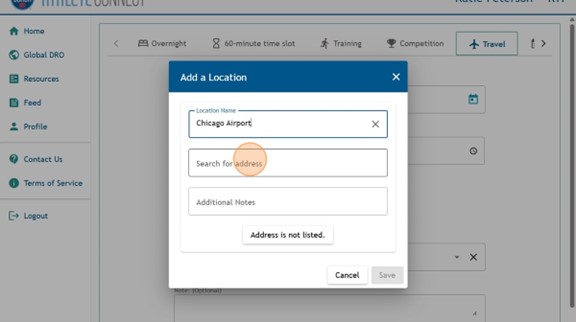
12. Input the name of the airport or the final destination that you are driving to, and add the address through the “Search for address” bar or the “Address is not listed” bar.
13. Click “Save”.
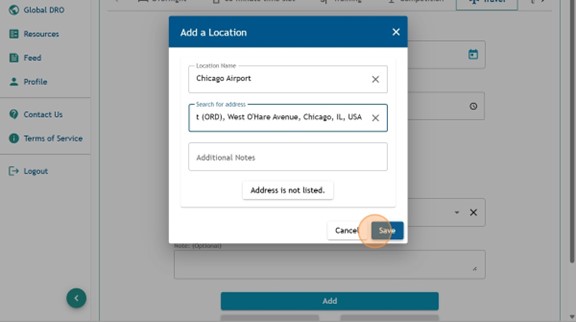
14. Input applicable notes in the “Note” field of the entry regarding your travels. Then, click “Add”.
15. Click “Add Event(s)”.
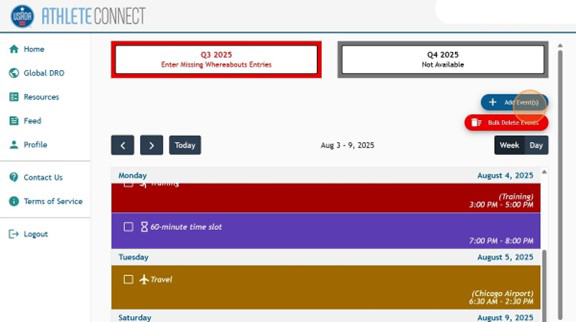
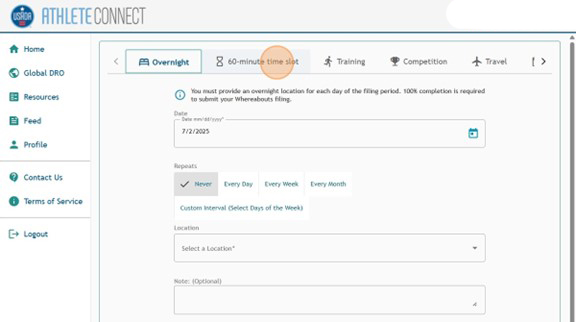
16. Next, we will input the 60-minute time slot entries for the period. Select the “60-minute time slot” tab at the top of the page.
17. Select the first date of the travel or competition period as the start date of the entry (example: August 5).
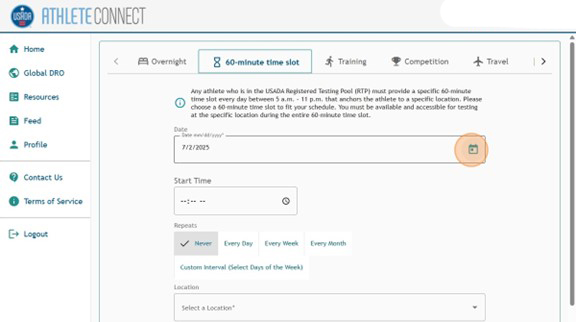
18. Designate the Start Time that you would like for the 60-minute entries during the period.
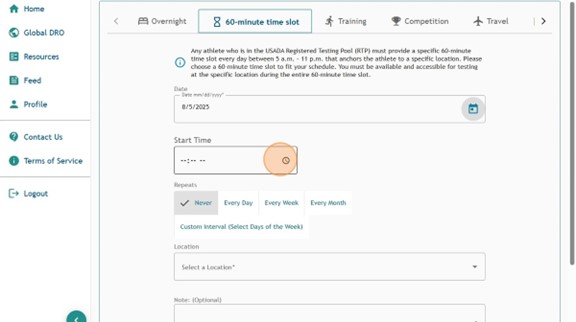
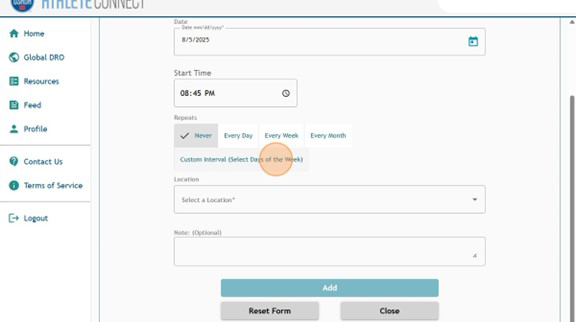
19. Click “Custom Interval (Select Days of the Week)”.
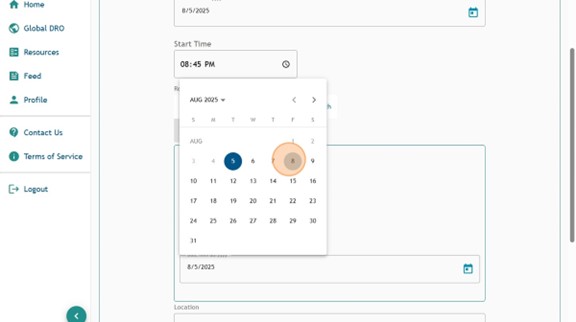
20. Select the last day of the period as the end date.
21. Add or select the location for your 60-minute time slot during the travel period.

22. Add any applicable Notes for the entry. Then, click “Add”.
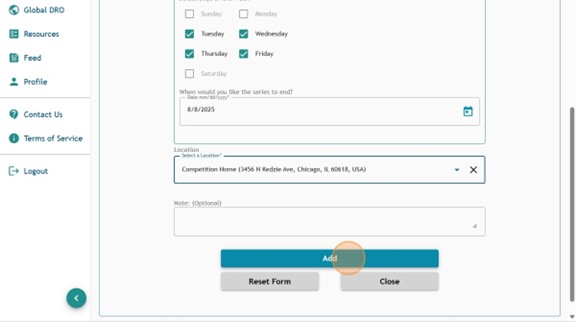
23. Click “Add Event(s)”.
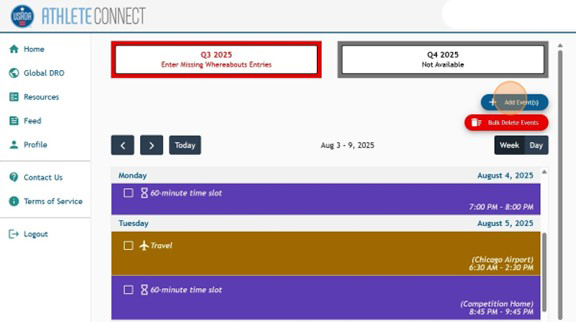
24. Next, we will input the Overnight entries for the period. Select the “Overnight” tab at the top of the page.
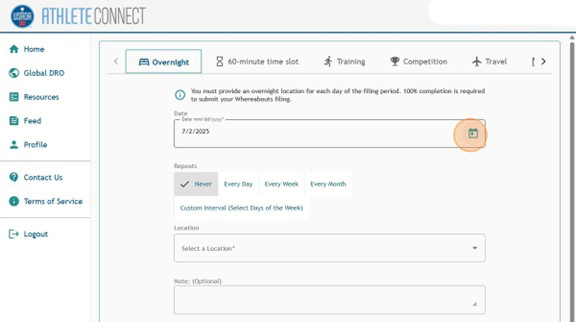
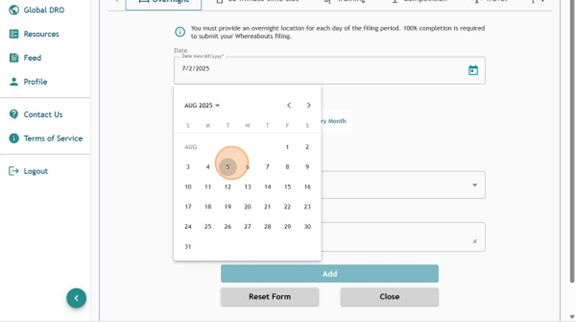
25. Select the first date of the travel or competition period as the start date of the entry (example: August 5).
26. Click “Custom Interval (Select Days of the Week)”.
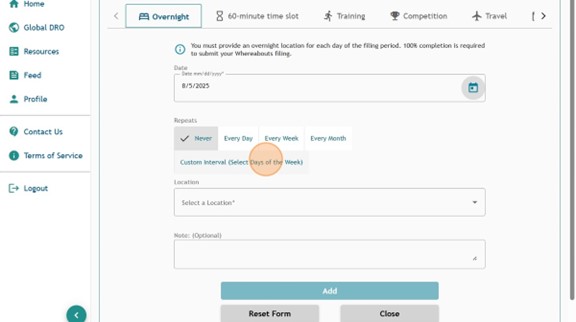
27. Select the last day of the period as the End Date.
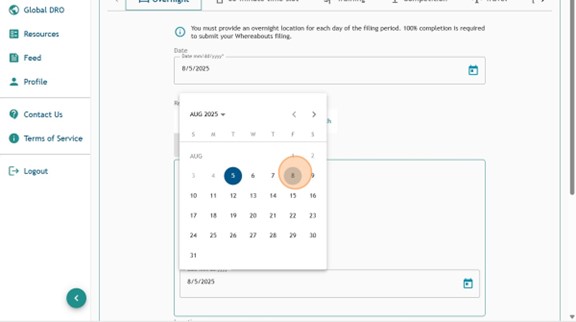
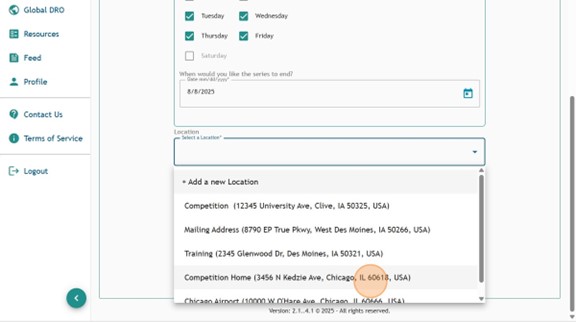
28. Add or select the location for your Overnight entry during the travel period.
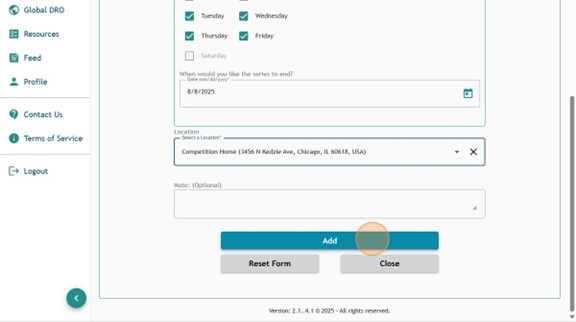
29. Add any applicable notes in the “Note” field. Then, click “Add”.
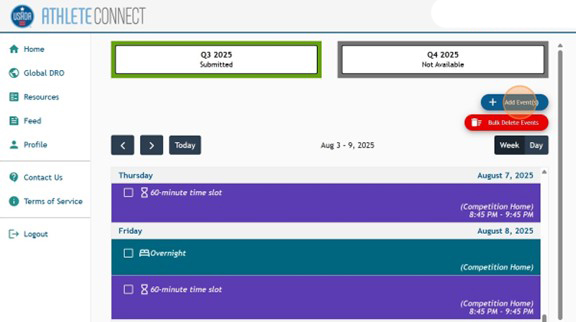
30. Click “Add Event(s)”.
31. Next, we will input the Competition entries for the period (if applicable). Select the “Competition” tab at the top of the page.
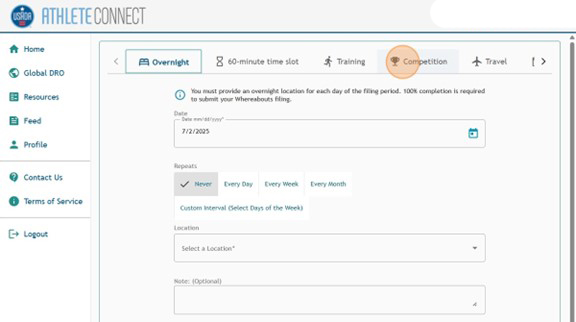
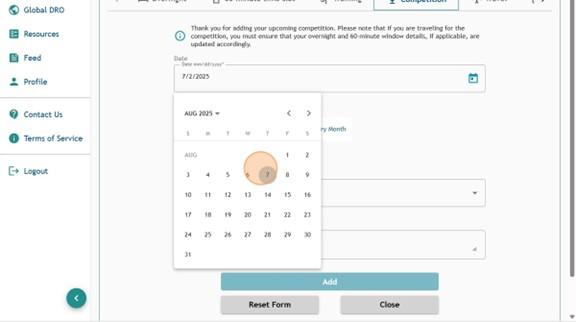
32. Select the date of the competition as the start date. Use the “Repeats” options below to designate multiple days for the entry if the competition is for multiple days. For this example, the competition entry is only for August 7.
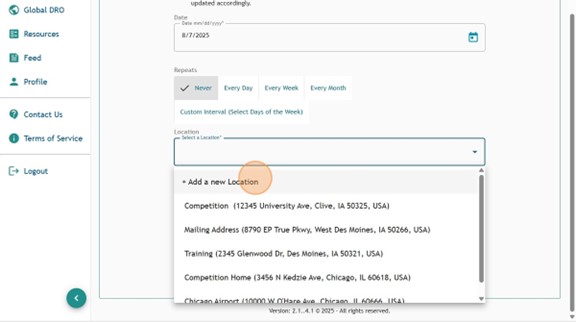
33. Add or select a location for the competition.
34. Input the name of the competition along with any applicable notes in the “Note” field.

35. Click “Add”.
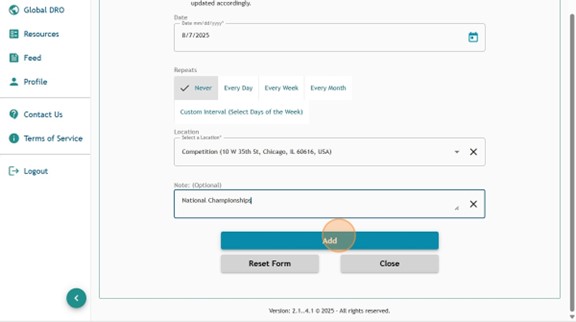
36. Click “Add Event(s)”.
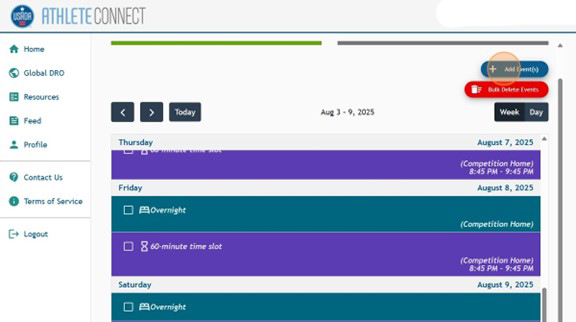
37. Finally, we will be inputting the last travel entry for the period. This entry will display the return back to the current Overnight address listed after the travel period. Select the “Travel” tab at the top of the screen. For this example, the travel entry will be for a return flight on August 9.
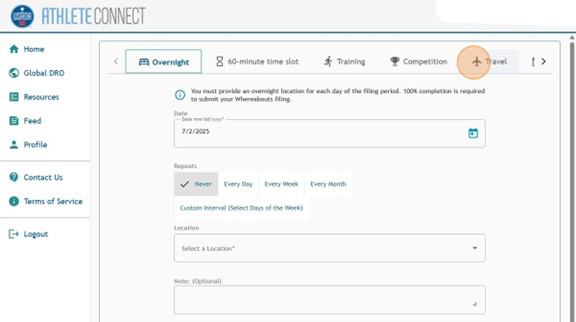
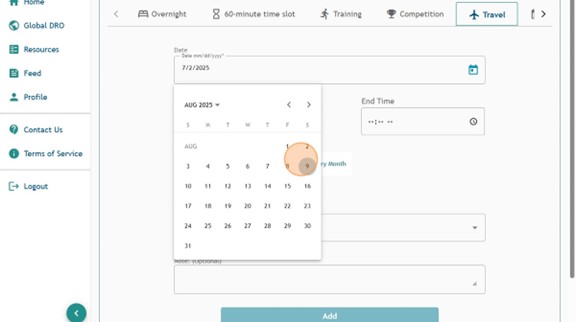
38. Select the date of travel as the start date for the entry.
39. Designate the Start Time for the entry as when the travel will start that day and the End Time as when you expect to complete the travel.
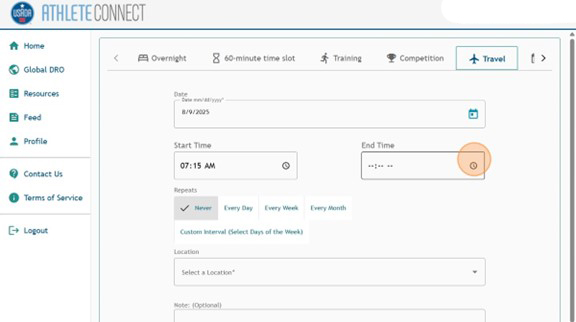
40. Add a location for the entry. If you are flying, the location should be the airport that you will be landing at. If you are driving, this location should be the address you are driving directly to.

41. Add any applicable travel related notes for the entry. Then, click “Add”.

42. Verify that all of the entries have been added for the period via the “Home” screen.
